Hanging Drapes In Bedroom
All of the tips and tricks you need for how to hang curtains quickly and easily! If you've got a curtain rod to hang in your home, this post will help you know how to get started.

HOW TO HANG CURTAINS
Last week Corey and I finally got around to hanging curtains in our master bedroom and, as always, I'm in awe of how big of a difference they make in the room as a whole. There's just something about curtains that brings it aaaaaaall together and makes it feel a little more polished, you know?
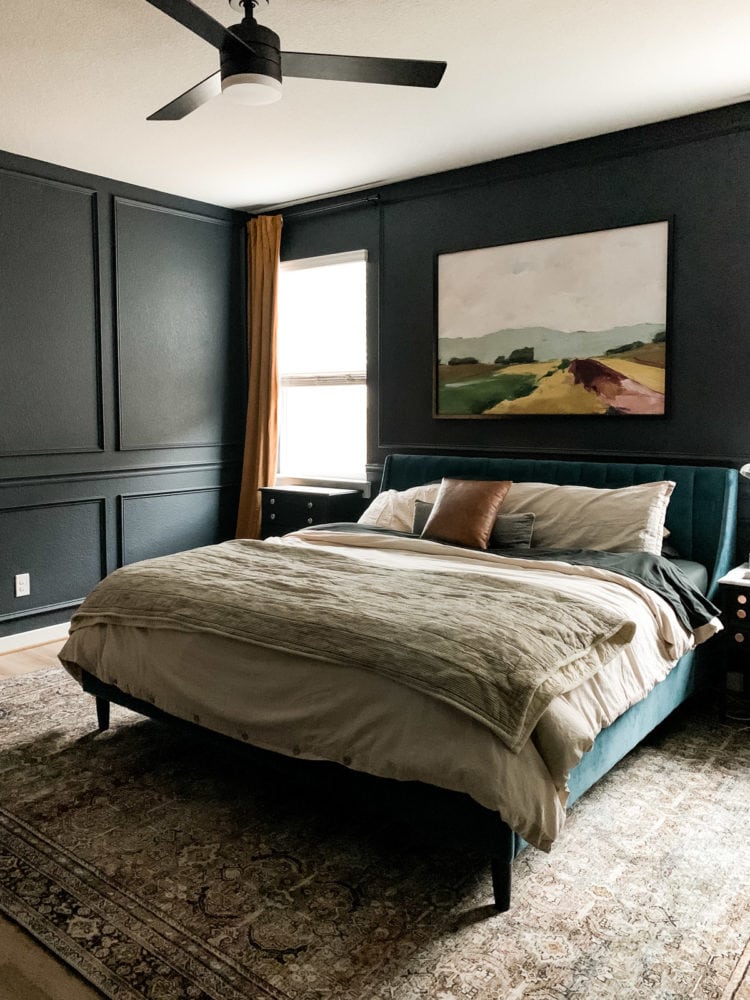
If you aren't all caught up on our bedroom, we recently added DIY picture molding to the entire room and painted it this gorgeous, luxurious blue (it's called Ink Black by Behr), and then we held a curtain fashion show over on Instagram stories to determine what color we should do for the curtains in here.
I'll admit, I was skeptical about the gold curtains. But, my goodness, were they ever the right choice. I'm so in love with how it turned out, and they really truly bring the room together in a way I never could have anticipated!
I hung these curtain rods myself – it was my first time hanging curtains and I needed quite a few pointers from Corey as I worked. So, I figured there were probably some of you out there who don't know how to do it either! So I put together this post with all of the tips and tricks I learned about how to hang curtains, along with a few other things you should know if you're going to embark on a curtain hanging adventure in your own home.
I'll get to the step-by-step in just a moment (complete with a simple trick that I wish I would have thought to use before I got started!), but here are a few basic DO's and DON'Ts first.
DO hang your curtains close to the ceiling
I'm sure you've heard it before, but here's your official reminder to always hang your curtain rods high and wide. If you hang your rods to look like they're hugging the window, it makes the window (and as a result, pretty much the entire room) feel smaller. Hanging them higher than the window creates the illusion that the window is larger than it is, and that your ceilings are taller than they are!
Most stores only sell 84″ curtains in-store, which can be confusing – that's too short for even a standard 8′ ceiling if you're hanging them high! Don't be fooled – you're going to want 95″ curtains for a standard 8′ ceiling, and even longer for higher ceilings. Yes, it requires some extra effort (you can't just pop into Target and pick some curtains up!), but I promise you it's worth it.
Our curtains are 108″ long. When you're determining how high to hang the rod itself, it's really just a personal preference – you can hang them so the curtains sit eeeeeever so slightly off the floor, so they barely skim the floor, or so they puddle a bit. I generally like mine to graze the floor just a bit – somewhere between a "skim" and a "puddle". Confusing, I know, but there's no real science to it – hold them up at a couple of different heights and see what you like, then go from there. My general rule of thumb is to hang the rod about 3″ below the ceiling.
DON'T skimp on the curtain width
Consider the width of your actual curtains when you're purchasing, even if you don't ever plan on closing them. We rarely pull our curtains all the way closed (we have blinds and tend to use those instead), but we always make sure to get curtains that theoretically could be pulled closed to cover the window.
Why? Your curtains will feel disproportionate if they're really skinny or don't bunch up at all on either side of the window. If you want to create a full, luxurious feel to your window trimmings, get curtains that can fully cover the window with even a little extra width. Many curtains have extra wide options, which is the perfect solution for those large windows.
Bottom line? Just be sure to check how wide the curtains are before ordering so you don't accidentally end up with a skimpy-looking setup!
DO know your style and plan accordingly
I used to love a bold, patterned curtain but over the years I've learned that my style really leans towards using simpler curtains and allowing other parts of the room to be the star.
I like for my curtains to quietly layer into the space and feel like kind of a background character. You might prefer something that feels bold and exciting – and that's fine! But if you try to go against your instincts and do something different because it's trendy or someone else suggests it, you'll be disappointed.
When we were planning this project, I heard from some people who were so disappointed that we weren't doing something with some pattern, other people who felt like it would look terrible if it was anything but white, and still other people who thought we should get a couple of different colors and change them out seasonally!
The lesson here is that we all approach curtains (and really, all decor) differently, and that's fine! Just know yourself well enough to stay away from the patterned curtains if you actually prefer something plain.
DON'T hang the brackets right next to the window.
I said it once already, but it bears repeating – be sure to hang your curtain rods a good 10-12″ wider than the window itself. This allows the curtains to cover the walls when they're open and not the window. It creates the illusion that the window is larger than it actually is and it also allows more light to flow into the room!
In a setup like ours in the bedroom, it's hard to hang the curtains wide (since the windows are right next to the wall), but we did it as wide as we could – and sometimes that's all you can do!

Now that we've covered the basics, let's chat about how to hang curtains!
This is really a pretty straightforward project – it only took me about half an hour to hang these curtain rods in our bedroom. But, there are a few tips and tricks that'll make it easier (including a genius template that I love), so let's dive into those details.
How to hang curtains – tips & tricks
materials needed
- Curtain rod (I'm loving these right now)
- Curtains (here are the ones we used in our bedroom)
- Drill, drill bits, & screws
- Drywall anchors (likely included with your curtain rod)
- Level
- Tape measure
- Cardboard (Optional. Grab an old Amazon box or anything you have laying around! Paper would work too, but cardboard is easier)
Step one: Determine your measurements
We've already talked a bit about this, but the first thing you'll want to do is figure out how high and how wide you want your curtains to be from the corner of your window.
For this, I just grabbed my first curtain rod bracket and held it up on the wall and played around with the spacing until I found something I liked. I knew I wanted the top of the bracket to be about 3″ below the ceiling, and in this specific space I wanted it to be as far away from the window as it feasibly could be. Generally, a good rule of thumb is to have the bracket somewhere around 10-12″ from the window (keeping in mind that the actual rod will extend another couple of inches past that).
Once you know where you want your bracket to sit, measure exactly where the two screws should be placed (how far from the window in both directions). You'll use this to create your template. This is definitely the easiest way to do it if you're new to hanging curtains or if you've got multiple windows to hang them on. If you're working in a weird space like ours where the spacing isn't the same on both sides, it may be easier to just measure and mark on the walls.
step two (Optional): Make your template
Once you know your measurements, you can make a simple template out of cardboard to make the rest of the job easier. Grab a rectangular piece of cardboard and draw lines across it for both the height and width measurements, then use your bracket to mark on the cardboard where your screw holes should be.
I don't have any pictures of this because we didn't do it for this particular curtain hanging project, but you can get a really good overview of what the process looks like on this post from Young House Love!
Whether or not you use the template, be sure to use a level when making your markings to make sure the bracket is hung nice and straight!

Step Three: Drill pilot Holes
Once you've marked your holes for the bracket (whether it's by using a cardboard template or simply holding the bracket in place and marking with a pen), your next step is to grab your drill, insert a small drill bit, and drill pilot holes in your wall.
There are a couple of reasons for this – first of all, it's much easier to drill your bracket into the wall if you've got some pilot holes for the screws to get started in, and it's also a fool-proof way to see if you'll need anchors. If you can feel that there's no stud behind the drywall (meaning, once the drill bit goes through the drywall there's nothing there), then you'll need to use an anchor. If you feel resistance all the way, then you've hit a stud and you can just use a regular screw.
Step four: Add anchors (if needed)
Your curtain rod probably comes with anchors, so you'll want to use those if you aren't drilling into a stud.
Use the directions provided with your rod to determine what size drill bit to use for the anchors, drill a hole (right on top of the pilot hole you've already drilled), then insert the anchors and hammer them into place.
Step five: attach brackets
Now you're finally ready to hang those brackets! Simply line the holes on the bracket up with the holes you've drilled in the wall (or the anchors), and use the provided screws to attach them to the wall.
You may need a middle bracket if your window is long – use the directions provided with your curtain rod to determine if this is necessary!
Step six: hang those curtains!
Once your brackets are all in place, you're ready to slide the curtains on and put the rod up! You just hung curtains!


I'm obsessed with our new gold velvet curtains in here and, while I was skeptical of them at first, I think they were definitely the right choice.
One set of curtains down, about a zillion more to go!
Baby steps, no?!
Want more comprehensive DIY guides? Here are a few others you might like!
Power Tools for Beginners Series
- How to use a miter saw
- How to use a jigsaw
- How to use a circular saw
- How to use a power roller
- How to use a paint sprayer
DIY GUides
- How to paint a room
- How to stain wood
Source: https://www.loveandrenovations.com/how-to-hang-curtains/
